How to prepare images for Screen Print (PAPER)
HOW TO SPLIT AN IMAGE
INTO 4 LAYERS FOR CMYK SILKSCREEN
1
Open Your image in Photoshop
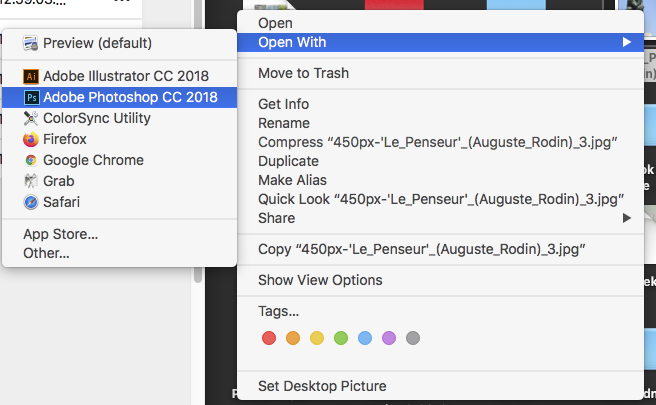
Open Your image in Photoshop
2
File format
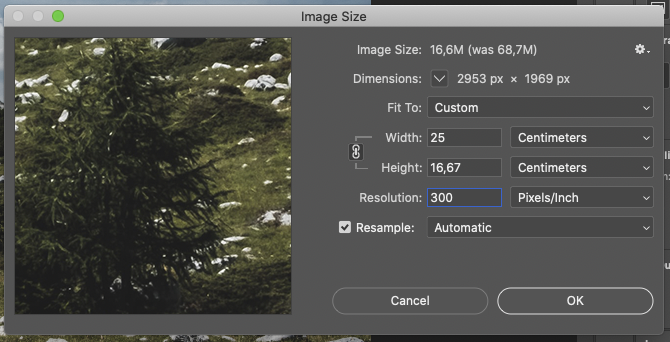
Make sure it is the right size, according to the paper format you want: <BR> - Go to Image > Image Size <BR> if you would like to change the dimensions, make sure the chain is locked in order to keep the proportions <BR> - Put the resolution to 300 dpi, then click 'ok'
3
Image Mode
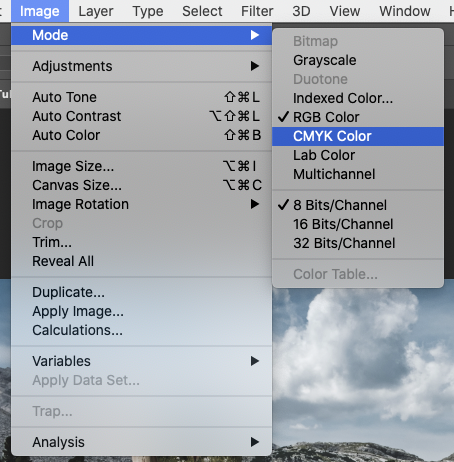
Check that your image is in CMYK:
- Go to Image > mode > CMYK
4
Split Channels
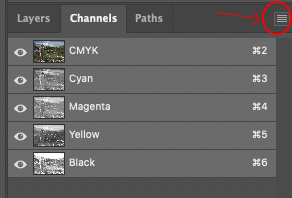
Go to Window > Channels
Go to the hamburger on the top right corner of the Channels window
Choose 'Split Channels'
5
A window for each Channel

Then it opens 4 windows, 1 for each channel:
(Cyan, Magenta, Yellow and Black)
6A
Bitmap
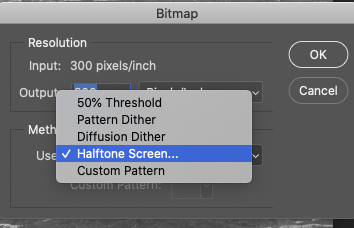
This you’ll have to do for each Channel:
Go to Image > Mode > Bitmap
It opens this little window
Keep the input and output to 300 dpi.
Choose the raster you like, most often Halftone Screen
6B
Bitmap
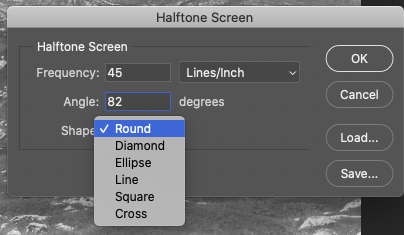
You will have to put a different angle for each Channel
Opinions differ on this, but here is one you can use:
Frequency: 45 (for all)
Angles: cyan 82 /magenta 52 /yellow 7 /black 22
Shape: Round or Ellipse (same one for all)
7
Real size check
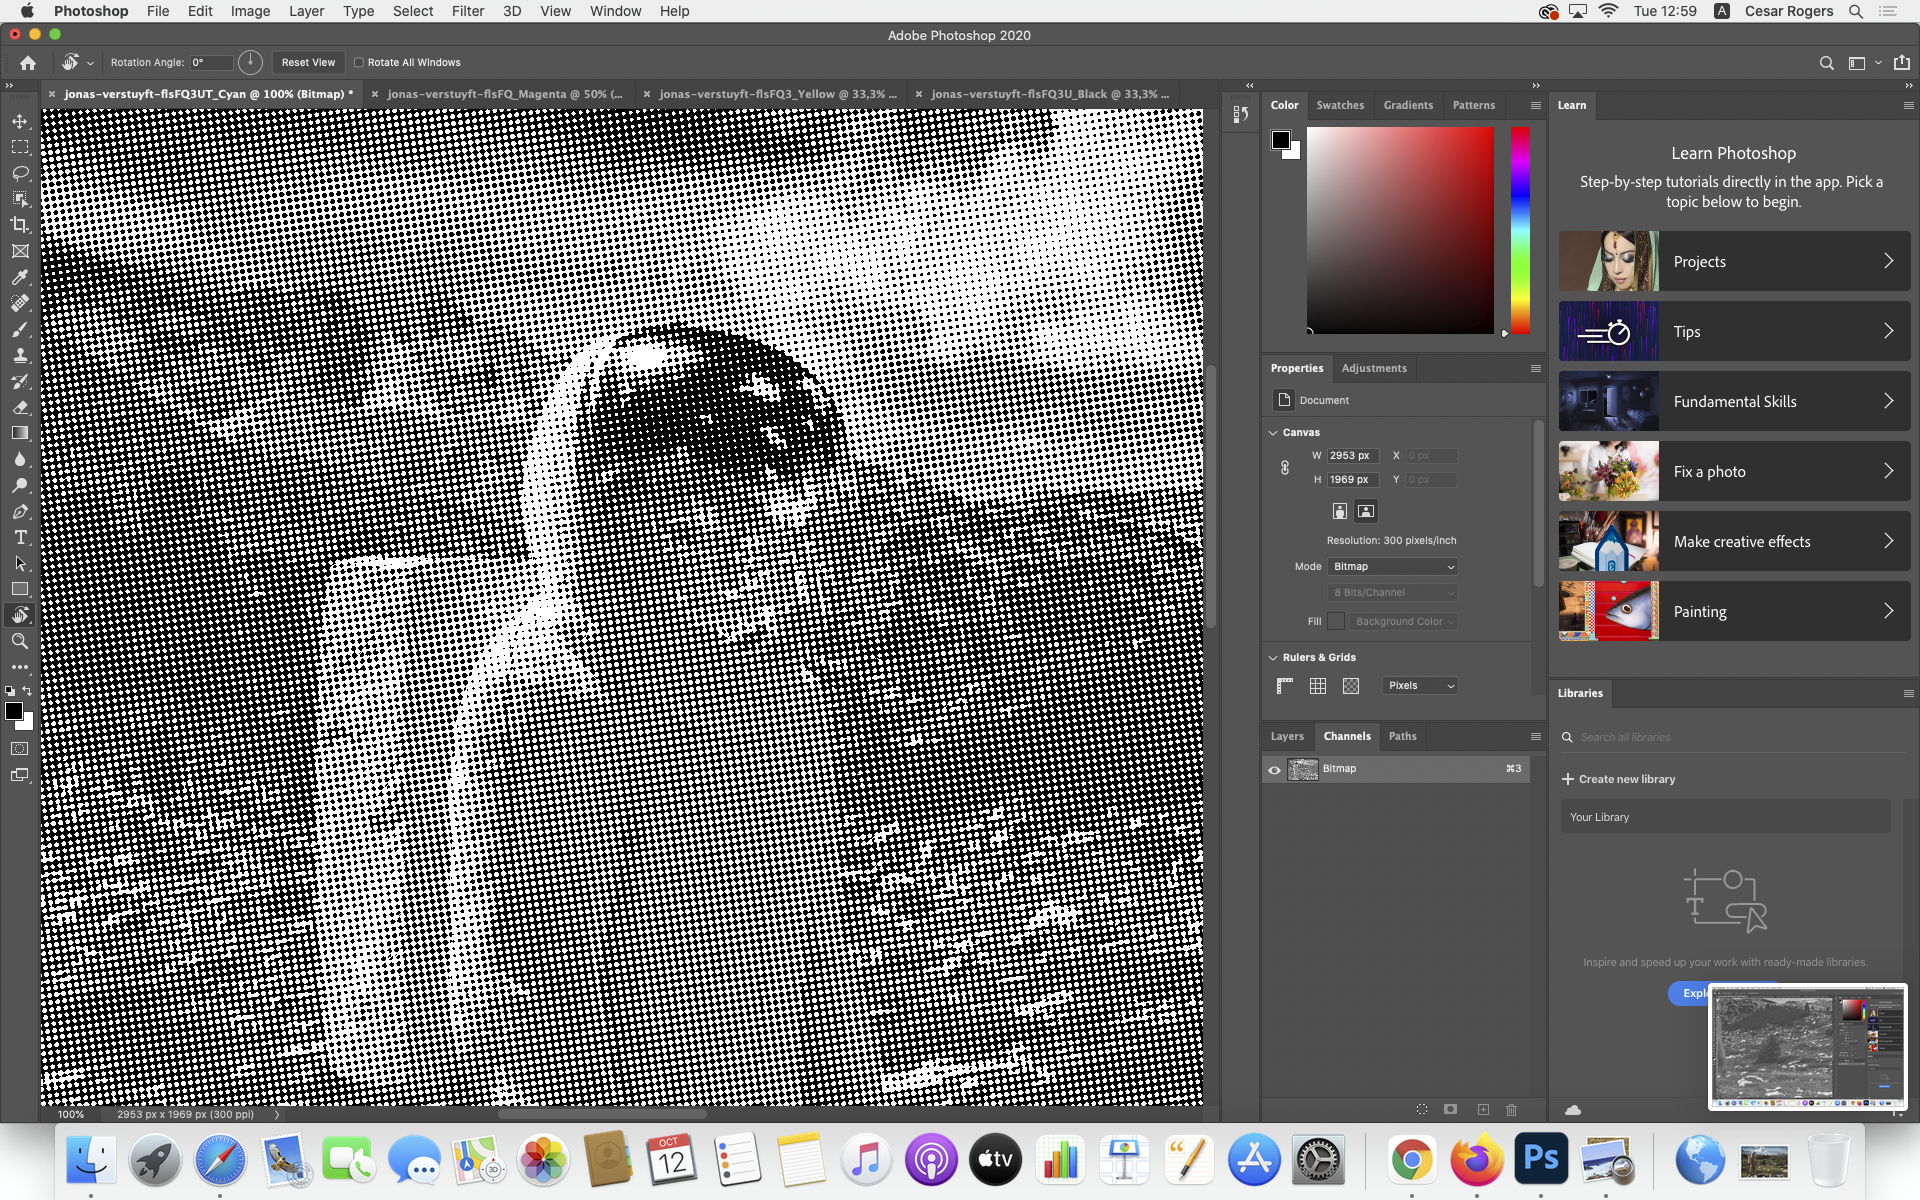
Check at 100% view if the dots looks right. (shortcut is cmd+1)
8
Cropmarks
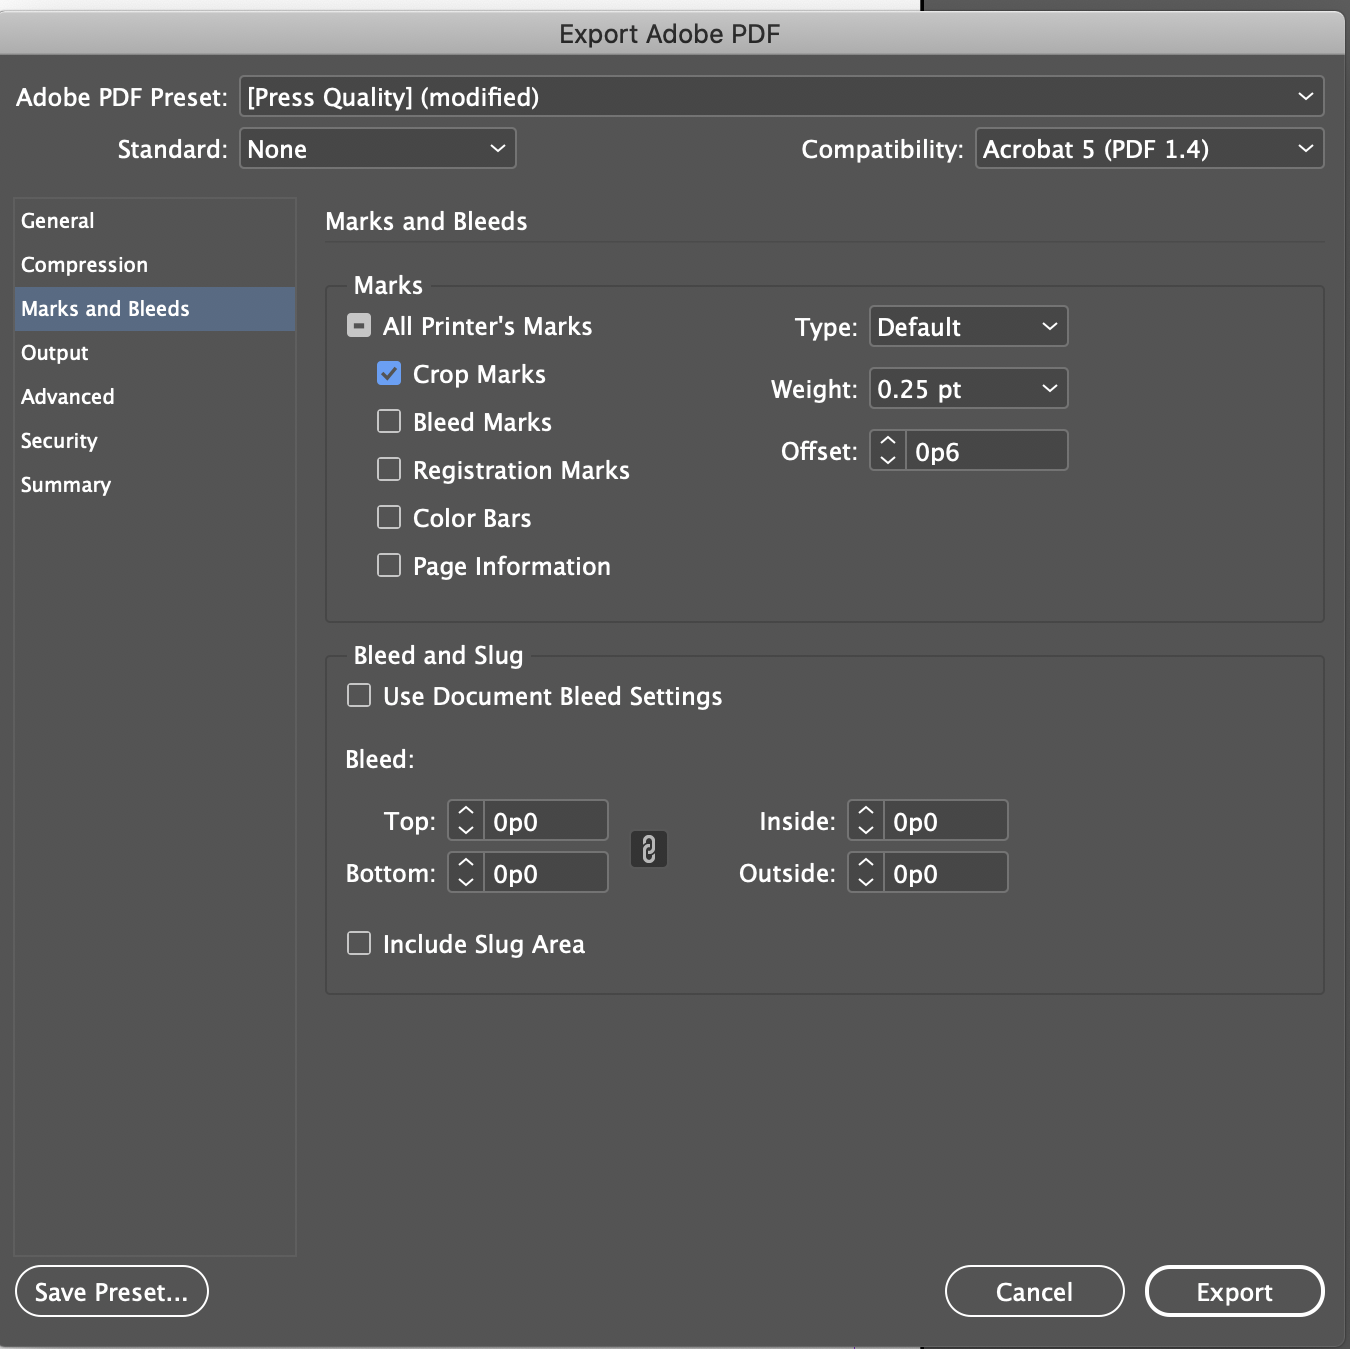
Now we are going to add cropmarks, necessary for a good alignment of the 4 layers :)
Import each 4 .psd file into a Indesign file of the same dimensions. Then just save each file as PDF, and tick the option 'Add cropmarks' on the export panel of indesign, in 'Marks and bleeds'.
Click 'Press quality' and 'Export'